|
|||||||||||||||||||||||||
|
A fine tuning challengeJohn Strait
Recently a user wrote to me with this question:
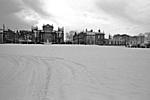
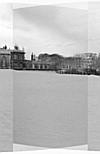
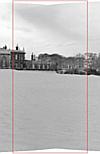
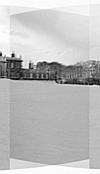
This article examines the user's images and how he fine tuned them as a way to illustrate some potential difficulties with fine tuning and how to avoid them. Figure 1 shows two of the images in the sample stitching project. These images are particularly challenging for The Panorama Factory because of the relative lack of detail in the foreground snow and in the sky. The most significant part of the image from the point of view of the stitcher is the middle (top to bottom) and this is in the foreground snow! (This is by no means a criticism of the photos, just an explanation of how The Panorama Factory looks at them.) It is harder for the software to correctly align low-contrast images and ones that lack detail. The fine tuner has particular problems with areas like the sky and foreground in thse images because particular fine tuning tiles may include insufficient detail to identify a match. This is the sort of thing that people do much better than programs. Of course, people find it much more tedious to do it themselves. With images like these, you may find, in addition to poor fine tuning performance, that The Panorama Factory doesn't do a good job of aligning the images in the first place. Images like these often require more manual adjustment than ones that are rich in high-contrast edges. Of course, most image sets will not experience these problems at all or to such a great degree. Most images will stitch automatically with no problems. But reading about these very difficult images should help you understand how to correct problems if they should arise, even if they are relatively minor. How The Panorama Factory can go astray Opening the overlap region shows three ways The Panorama Factory can go wrong. First, the overall alignment (before fine tuning) is incorrect. When the alignment is correct, there should be very little image offset (between the left and right images) near the center of the overlap region and the offsets should increase outward from the center. Figure 2 shows the overall alignment from the sample stitching project. In this example, the alignment was dominated by the strong detail in the building at the left of the overlap.
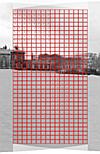
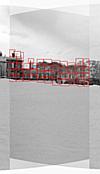
To see the overall alignment in your own projects and to subsequently adjust it, you must first open the overlap region by clicking on the top or bottom edge of an overlap rectangle or double-clicking on one of its sides when the stitched image is showing (see the Stitch command). Then you must clear the fine tuning with the Clear fine tuning command (Image menu). After clearing the fine tuning, you can see the whether the overall alignment is correct. Second, The Panorama Factory probably chose the wrong value for focal length. When the focal length is correct, the image offsets should be relatively small across the middle section (top to bottom) of the overlap region. But in this example, if we were to adjust the alignment so that it is correct at the center, the image offsets would be relatively large -- about the width of a window in the building at the left side of the overlap region. This happens because the automatic focal length refinement gives poor results when images are low-contrast or lack detail. Finally, the automatic fine tuning produced incorrect results. You can see this in the sky region where there is a discontinuity in the fine tuning results between the left and right portions of the overlap. In the lefthand portion there are relatively large fine tuning offsets. In the righthand portion the fine tuning offsets are close to zero. Figure 3 shows the results from the automatic fine tuning in the example project.
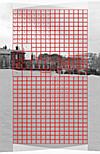
The fine tuning discontinuity resulted from the way that the The Panorama Factory's successive-subdivision fine tuning method works. After its initial division of the image into left and right portions, the fine tuner came up with very different results in the two regions. These different results were propogated into the successive subdivisions of the regions. You watch the subdivision in action by executing the Fine tuning command (Image menu) when the overlap region is open -- it shows the fine tuner operating in real time. Why a little editing may not help OK, suppose you open the overlap region of the sample project and remove and/or adjust a few fine tuning tiles until the result looks good. When you close the overlap region, the result may still look wrong. For example, Figure 4 shows how you might edit a few of the tiles, and Figure 5 shows how what it might look like after you close the overlap region. You can see that everything is mixed up right in the center of the overlap. So why did the result turn out the way it did? Because there were still many inappropriate tiles in your overlap region. These were, in all cases, tiles that were created by the automatic fine tuning. To understand why this matters, you need to know a little about how The Panorama Factory uses the fine tuning tiles. Each fine tuning tile defines how the images must align at the very center of the tile. The Panorama Factory deforms the overlapping images to fit each tile. The fit is perfect at the center of each tile. Between tiles the images are deformed smoothly so that all tiles are fit exactly. Here is the way I envision it: Take a sheet of rubber and lay it on a flat surface. Insert a thumbtack through the sheet of rubber to anchor it down. Stretch the sheet of rubber and insert another thumbtack. Stretch it again and insert a third thumbtack. And so on. Each thumbtack represents a fine-tuning tile. The problem is how to deform the image so that all tiles fit exactly in their centers. Between tiles, the image deformation is directed by the influence of the tiles. Nearby tiles have a greater affect, and distant tiles have less effect. Although I think of this as like a sheet of rubber with thumbtacks, the deformation is not the same as you would get with this physical model. The image alignment is absolutely correct at the center of each tile you drew yourself. However, the inappropriate tiles cause the image alignment to become more and more incorrect as you move away from the centers of the correct tiles. Because there are so many incorrect tiles, and they are in such close proximity to the correct tiles, the overall result is dominated by the incorrect ones. What you can do to get better results To get good results with images like these, you may need to control all of the steps yourself.
When you get everything right, the result looks pretty good. Figure 8 shows the result of correct focal length, correct alignment and correct fine tuning.
|
||||||||||||||||||||||||
|
Revised: April 28, 2004 © 1999-2005 Smoky City Design, LLC and John Strait |
|||||||||||||||||||||||||
