In this step, you stitch the remaining rows of images into horizontal
panoramas that are parallel to the first row. If all goes well, these rows will match the spherical coordinate system of the
first row. Repeat these steps for all of the rows.
-
Choose the
Show imported images command (View
menu) to display the imported thumbnails in the lower pane.
-
Select the thumbnails for the row and
choose the
Stitch with the
Wizard command (New image menu).
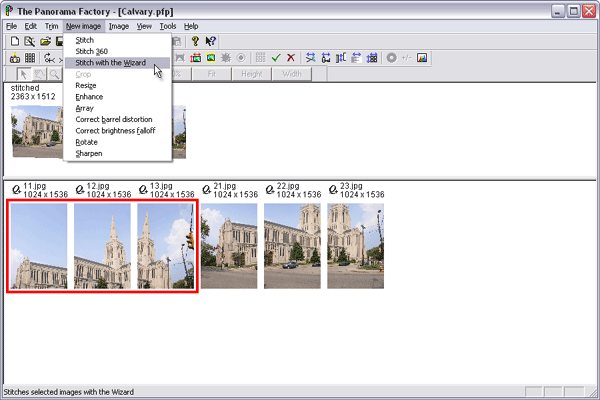
-
This time, remove the checkmark from
Automatically detect focal length and then choose I am certain of
the focal length on
Wizard 3/9. This guarantees all rows are stitched with the same focal
length setting (the first stitch sets the Wizard value to the detected
focal length).
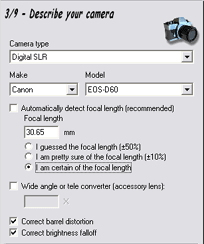
-
Advance to
Wizard 6/9 and place stitching points on one image pair as you did for
the first row. As before, I recommend this procedure for placing
stitching points:
-
Place stitching
points on one image pair. I recommend using distant points and/or points all
in the same plane.
-
After placing 5 points, you should get a dot in
the Images list.
-
Once you have the image dot, go back to each stitching point in
turn and examine them at large zoom scale (400% or 500%). Adjust the
stitching points so that they match well on the two images.
-
Repeat this procedure for all image pairs.
It's important to get a dot in the images list for each pair of images.
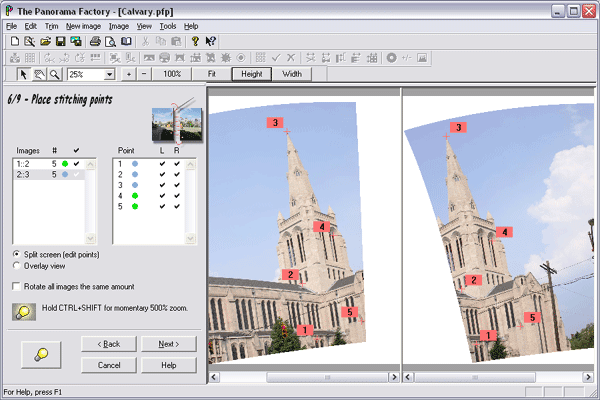
Notice that the images have
become cockeyed as a result of the manual stitching. This is caused
by variations in camera tilt (pitch axis) and rotate (roll axis) from one
image to the next. This is normal. We will correct it with
the warping grid in the next step.
Also, notice that the warped images will be wider on the top or
the bottom, depending upon whether the row is above or below the center,
making a keystone shape for smaller tilt angles or a mushroom shape for
larger tilt angles. This is normal.
The degree of keystoning or mushrooming will depend upon the tilt angle you used for the
upper row.
-
Advance to
Wizard 7/9.
As in the first row, you'll use the warping grid to correct the manual
stitch to be level and square. For more information about the
warping grid, refer to the section "Wizard
step 7/9 – Preview at low resolution" in Chapter 1 of the online
help.
When you first enter this Wizard step, it will
show you the results of the manual stitch before applying the warping
grid. In our example, the image is rotated counter-clockwise from level.
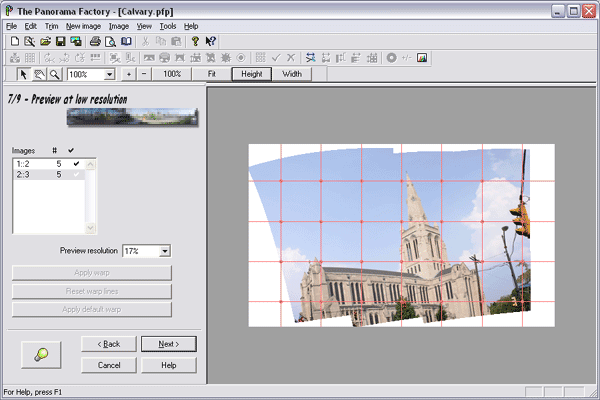
-
Place a pair of handles (red
dots) on vertical lines at the left and right ends of the church.
You do not need to use the same vertical lines that you used for row 1.
Any vertical lines will do.
As in the first row, we have
increased the preview resolution to 50% to help place the handles more
precisely.
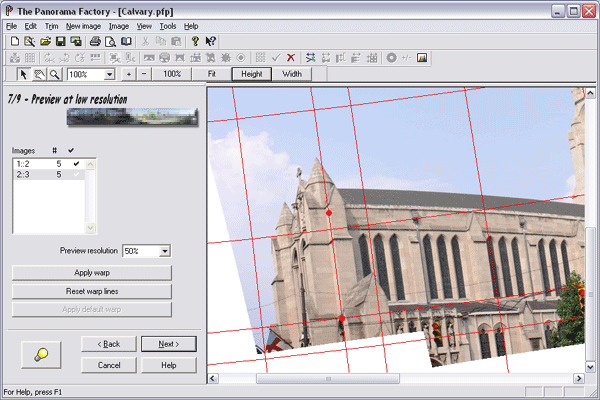
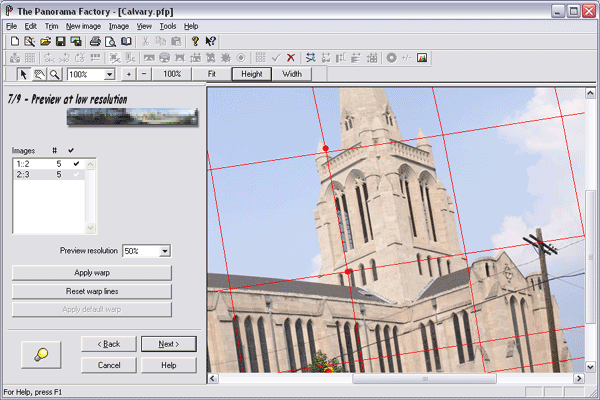
After placing the three handles, click Apply warp.
-
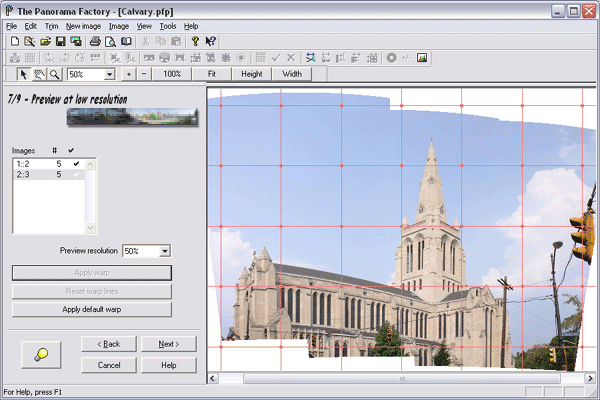
Examine the preview image. After applying
the warp, all vertical lines should be perfectly straight and
plumb. If not, adjust the warping grid until you are
satisfied. There is no loss of image quality if you apply the warping grid
multiple times because the image is recomputed from the original image
data each time you rewarp.
-
Advance to
Wizard 9/9 to complete the stitch and click Done to exit the Wizard.
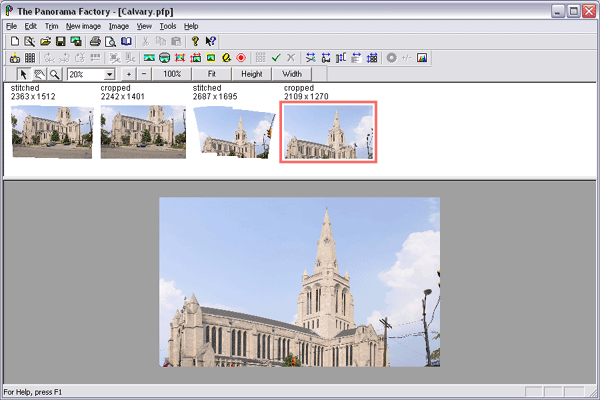
At this point, you should have a stitched thumbnail and a cropped
thumbnail for each row in the upper pane. The most recent cropped
image should appear in the lower pane.
-
FOR THE BOTTOM ROW ONLY:
When you stitch the bottom row (if it was not the first row you stitched),
choose the
Panoramic properties command (Image
menu). Write down the Below value from Vertical field of view (degrees)
in the
Panoramic image properties dialog box. We'll need this value
in a later step. We'll refer to it as StepAB_Below.
-
Click Cancel to close the
Panoramic image properties dialog box.


