In this step, we stitch the rows together.
-
Note that the rows may be in the wrong order.
They need to be in order from lower row to upper row for
stitching. To move a thumbnail, first single-click it so that only
one thumbnail is selected. Then click and drag the thumbnail to its
new position.
-
Select all the rotated thumbnails at once.
Click the first rotated thumbnail to select it and then hold the CTRL key
while you click each of the other rotated thumbnails. After these clicks,
you should be able to see that the rotated thumbnails are selected
and all other thumbnails are not selected.
-
Choose
the
Stitch with the
Wizard command (New image menu).

-
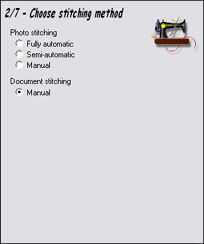
Choose Manual document stitching on
Wizard 2/9. This stitching method joins the images without
warping. It is unnecessary to do any additional warping because the
row stitching has already converted the images to spherical coordinate
system. Manual document stitching also permits the images to be
different sizes.
-
Advance to
Wizard 4/7. Surprisingly, you need not place any stitching
points here! Simply click the Next button and confirm that
you want to advance to the next Wizard step. You'll be prompted with
a message box asking whether you want to advance with incomplete stitching
points. Click Yes.
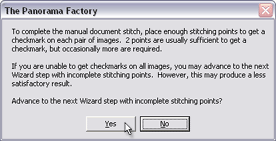
It is OK to
advance without placing any stitching points. This forces The
Panorama Factory to perform automatic alignment on the images and usually
produces the best results. Placing stitching points carries the risk
that the images may be rotated slightly during the alignment. This
is usually the right thing when actually stitching document scans, because
it corrects for rotations of the document when placed on the document
scanner. However, in this multi-row procedure, we want to avoid any
new rotation after the initial row stitches.
-
Advance to
Wizard 5/7.
Examine the preview image to be sure the stitch is accurate. You may
need to adjust the preview resolution. The default setting for
preview resolution assumes you are stitching a normal panorama and it
sometimes makes a poor choice here. But in any case, do not set the
preview resolution too large or this step will be very slow!
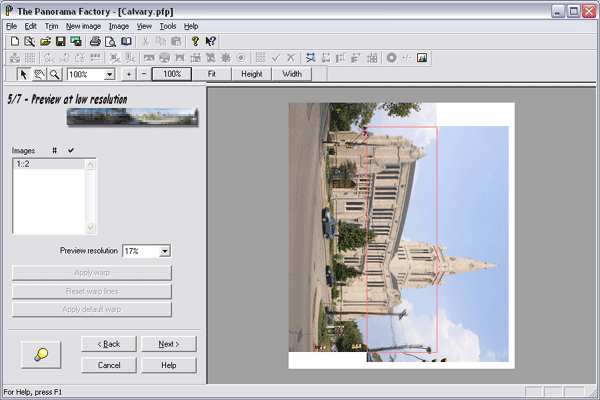
If the stitch
is not accurate, you should return to
Wizard 4/7 and add stitching points. We recommend that you only
add one stitching point pair to each image pair. A single stitching
point pair defines the image-to-image alignment without introducing image
rotation.
-
Advance to
Wizard 7/7 to complete the stitch and click Done to exit the Wizard.
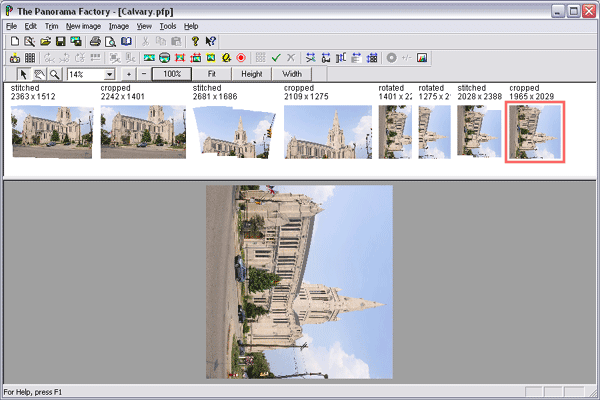
You should see a new stitched thumbnail and
a cropped thumbnail in the upper pane. The cropped image is shown in the lower
pane.