| Author |
Message |
    
Frank Grages
New member
Username: Frank_grages
Post Number: 1
Registered: 7-2007
| | Posted on Sunday, July 01, 2007 - 11:35 am: |   |
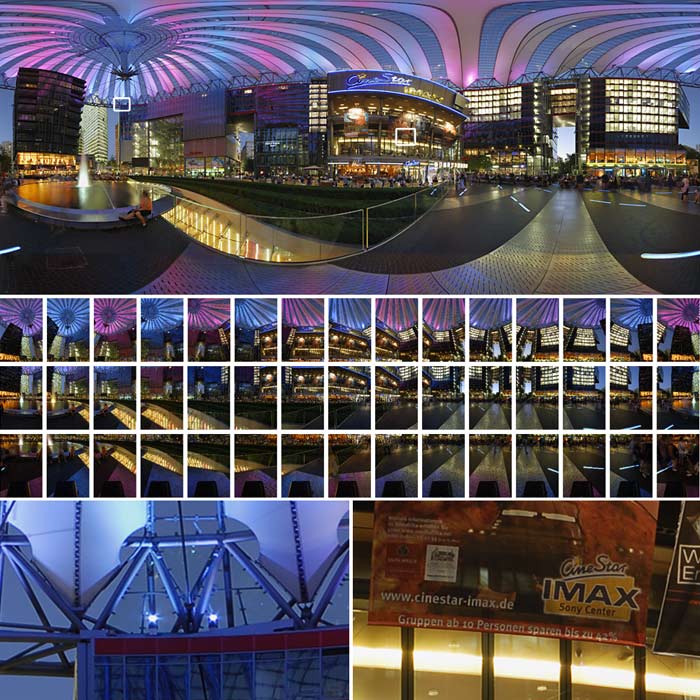
Iīm currently working on a 360x180 degree panorama of the Sony-Center in Berlin, Germany.
The project has a total of 45 pictures (3 rows x 15 pictures).
I stitched 3 rows (middle, up, down) following the instructions given on the panorama factory website. Each row fits almost perfect with very small stitching errors. I can stitch the middle & upper row, getting very good results.
But I fail completely when trying to stitch the lower row to the middle&upper. The attachment shows a work-in-progress screenshot with the lower row placed with photoshop. (you can see the change in color in the lower third of the composed image)
It seems that the proportions of the lower image are not ok. You can tell this by the angle of the glass railing. I could send you the project data, but it will be a HUGE upload  (sending you a DVD with the files would be an option, too). (sending you a DVD with the files would be an option, too).
Any Ideas?
Best regards
-Frank
 |
    
John Strait
Moderator
Username: Jstrait
Post Number: 309
Registered: 5-2001
| | Posted on Sunday, July 01, 2007 - 7:24 pm: |   |
Hi Frank, I am out of town until Wednesday with limited internet availability.
I would be happy to look at your project when I return. A DVD would be OK -- If you contact support @ panoramafactory.com I can give you a mailing address. Another possibility would be to upload the .PFP file and reduced-resolution copies of the original image files. I could enlarge the image files after receiving them. This might let me see what is happening.
Does either of these options sound reasonable? |
    
Olivier Detry
New member
Username: Kitarolivier
Post Number: 15
Registered: 4-2007
| | Posted on Monday, July 02, 2007 - 3:17 am: |   |
Hi !
I had the same kind of problem, and John pointed a few errors, and these following 2 were the most 'fatal' :
1.I stitched some rows Cylindrical, and other Spherical. Be sure to stich all as spherical.
2.With the cropped rows, be sure to extend each row to 380° before stitching rows together.
Hope this help and save time to John 
Regards,
Olivier.
|
    
Frank Grages
New member
Username: Frank_grages
Post Number: 2
Registered: 7-2007
| | Posted on Monday, July 02, 2007 - 2:02 pm: |   |
Olivier:
thanks for your tips. Each of the stitched rows were extended to a field of view of 380 degrees as described in the turorial.
I will check the type of projection used while stitching, but Iīm almost 100% sure that I used "spherical projection" for all 3 rows.
John:
I could scale down the images to a size of 669 x 1000 pixel/8 bit/jpg instead of 2592 x 3872 px/16 bit/tiff. With a size of about 150 KB for each picture that would be an upload of around 6.5 to 7 MB. Would that be ok? If the files were too large for Upload, I would prefer to burn a DVD and send it by pmail.
best regards
-Frank |
    
John Strait
Moderator
Username: Jstrait
Post Number: 311
Registered: 5-2001
| | Posted on Tuesday, July 03, 2007 - 2:42 pm: |   |
Hi Frank,
6.5 to 7 MB sounds fine. Please send it by email to support @ panoramafactory.com instead of posting it here, OK?
Be sure to include the .PFP project file. Save the project after trying to stitch the lower row to the middle&upper. That way I should be able to see exactly the same thing you are seeing.
Be sure to mention in the email message that this is for my attention. |
    
Frank Grages
New member
Username: Frank_grages
Post Number: 4
Registered: 7-2007
| | Posted on Wednesday, July 04, 2007 - 3:10 pm: |   |
Hi John,
I sent you the mail(s) with the project file and the down-scaled photos. Iīm not sure if the mails are sent correctly because I got some smtp-server errors...if the mails do NOT arrive, I could upload the files to my webspace and send you a link to download
best regards
-Frank |
    
John Strait
Moderator
Username: Jstrait
Post Number: 316
Registered: 5-2001
| | Posted on Friday, July 20, 2007 - 6:22 pm: |   |
Hi Frank,
Thank you for sending the images. I was able to work with the reduced-scale images and your stitching project file. I thinkn I see what happened.
You wrote that the stitching error happened when you stitched the rows together and that it shows in the area of the glass railing.
Here's a overview of the panorama and a detail of the stitching error I see in the top of the glass railing:
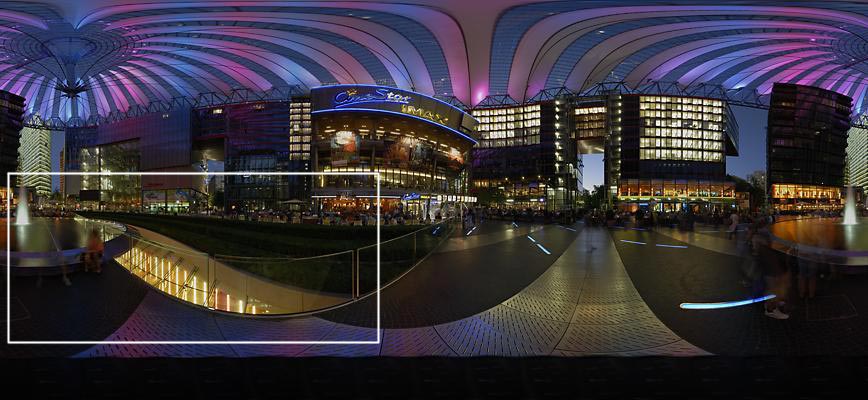
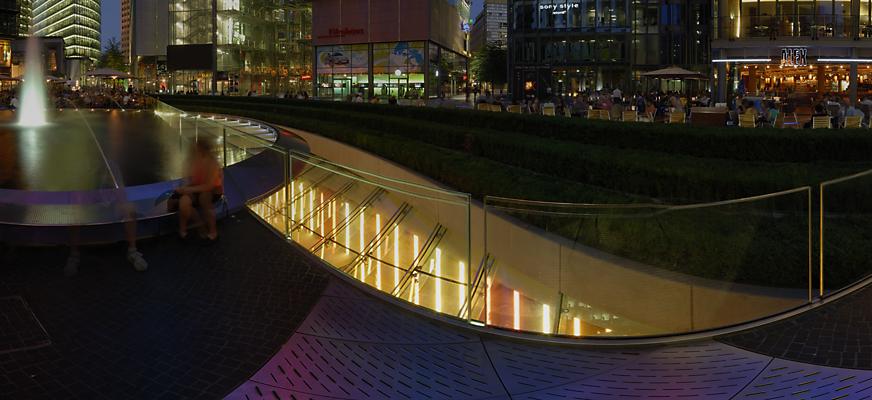
The top of the railing shows a double line at the left end (near the fountain) and becomes a single line at the right end (away from the fountain).
This is happening because of parallax differences between the center and lower rows. We are accustomed to thinking about parallax differences as a left-right shift from one picture to the next when the camera's nodal point is not directly above the tripod's axis of rotation.
It is also possible to have parallax differences between one row and the next when the camera's nodal point is not directly aligned with the panoramic head's vertical rotation. These show as up-down shifts between the rows.
You can see this shift in the area where the railing crosses in front of the rear edge of the opening as shown in these two images from the center and lower rows:
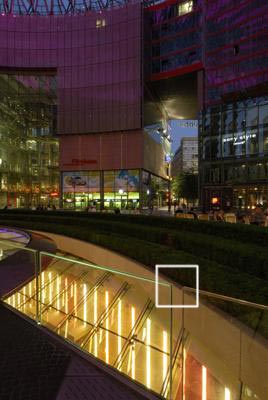 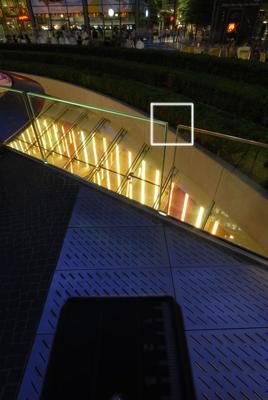
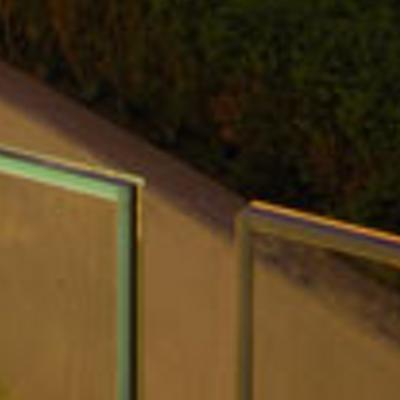 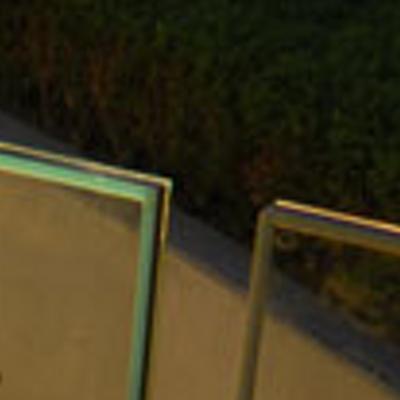
When there are parallax differences, it is not possible to simulataneously align the foreground objects (the railing) and the background objects (the rear edge of the opening). The automatic fine tuning step tries to do the best it can. In this case, it aligned the wall at the left end and aligned the railing at the right end. This caused the railing to split and rejoin.
(Notice in the detail of the stitched image that the rear edge of the opening becomes a double line approximately where the railing becomes a single line.)
You can try to correct this in a variety of ways. Sometimes it's possible to manually adjust the fine tuning to get a result that looks good enough. Sometimes you can adjust the boundaries of the blending region to omit the area with the double images.
I used both techniques together, and got this result:
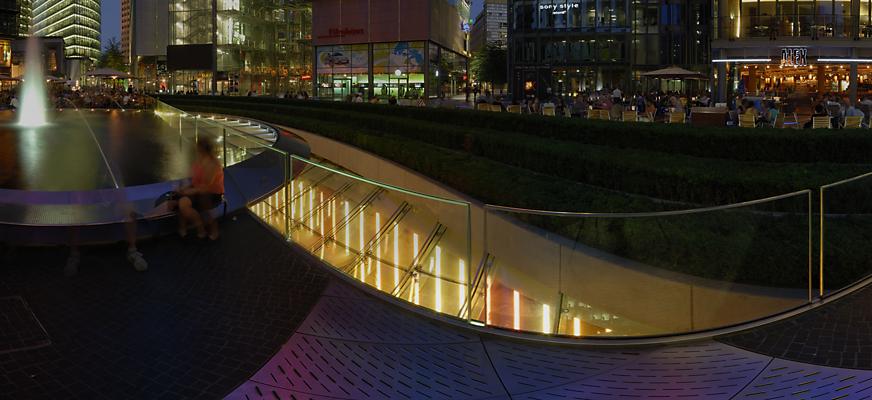
It may not be perfect, but I think it is a significant improvement.
If you'd like more information about adjusting the fine tuning or adjusting the boundaries of the blending region, I can direct you to the relevent sections in the online help.
Hope this helps!
(Message edited by jstrait on July 20, 2007) |
    
Frank Grages
New member
Username: Frank_grages
Post Number: 8
Registered: 7-2007
| | Posted on Wednesday, August 15, 2007 - 2:16 pm: |   |
Thank you, John.
The Problem was that the horizontal rotation of the camera was set-up to be around the nodal point but the vertical rotation was around the middle of the cameraīs body and not around the nodal point. Stupid Frank! ;-)
I think Iīll buy an adapter for my tripod to allow vertical rotation around the nodal point as well and go out and take a new set of pictures :-)
Thanks again for the good explanation
-Frank |