| Author |
Message |
    
Vladislav Kravchenko
Unregistered guest
| | Posted on Tuesday, May 03, 2005 - 5:54 am: |   |
I use Sony W1 camera. I usualy don't use a trpiod when I taking the shots (it is impossible to take such huge thing to bike trips). The panoramas makes in PixPaker Pro stiches perfectly. But they have only one mistake - I can see bounds of different images because the software doesn't correct brighness falloff of the camera lens.
Then I found The Panorama Factory. It does its job well but The PF can't stitch the imgaes without some blurry regions (it is happens at overlap regions).
It is very obvious at places where trees or other small objects are.
It is possible to fix that?
I have tried everything. I have also read the documentation and faqs but it doesn't help :-)
|
    
Vladislav Kravchenko
Unregistered guest
| | Posted on Tuesday, May 03, 2005 - 6:11 am: |   |
I have tried also to correct barrdel distortion in stand alone application. It correct the distortion. Then I tried to restitch the images in The PF with disabled barrel distortion. The result became better. I couldn't see any blurry areas. But the pictures weren't aligned properly at the upper part of the panorama. |
    
John Strait
Moderator
Username: Jstrait
Post Number: 179
Registered: 5-2001
| | Posted on Wednesday, May 04, 2005 - 9:10 am: |   |
It's very hard to diagnose a problem like this without seeing the images themselves.
However, this sounds like either automatic fine tuning was turned off or automatic fine tuning did not do a perfect job on your panorama.
If the advice given in the web pages Fine tuning the image alignment and A fine tuning challenge has not helped you, then I recommend you send an email to support@panoramafactory.com.
When you have problems with specific images, it is usually best to open a customer support dialog through support@panoramafactory.com. That way we can request additional information and exchange email attachments if needed.
(Message edited by jstrait on May 04, 2005) |
    
Vladislav Kravchenko
Unregistered guest
| | Posted on Thursday, May 05, 2005 - 2:49 pm: |   |
Thank you for your advise. I read these articles and I tried to do the same things. But I couldn't do better :-(
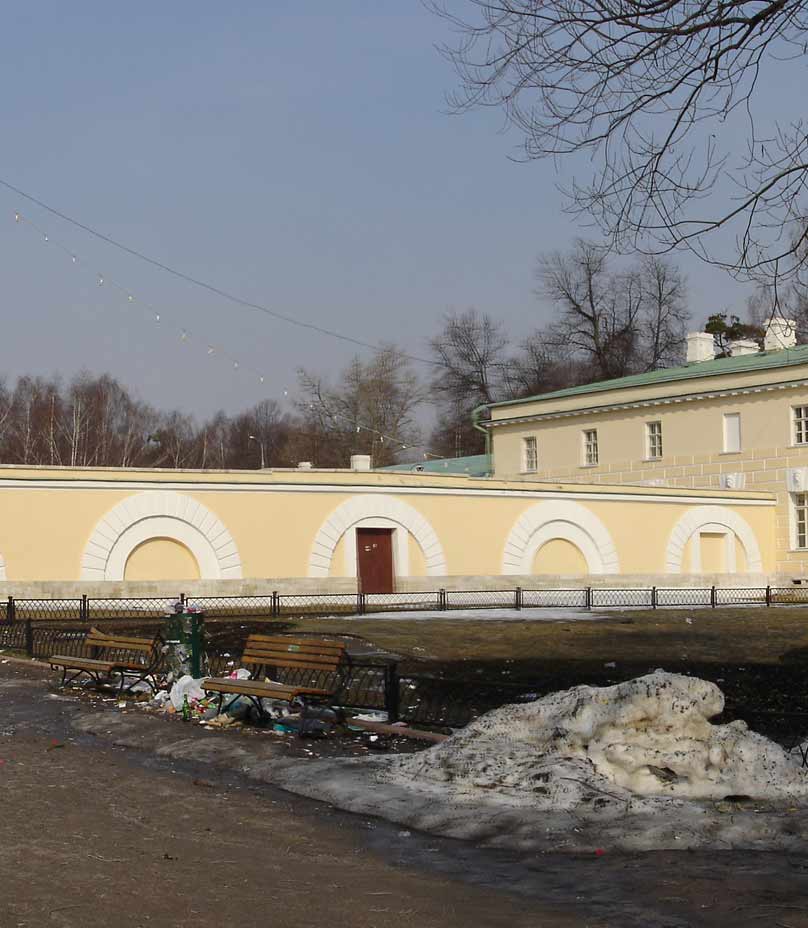
Here is a crop from a pono that was made by PixMaker Pro. It is jpeg compressed so it doesn;t look well :-)
But PixMaker did its job very well. I see a very sharp bench and all small branches of the tree. Even small pices of gurbidge are clearly seen. The obly thing that is annoying is a vertical line on the sky. |
    
Vladislav Kravchenko
Unregistered guest
| | Posted on Thursday, May 05, 2005 - 2:53 pm: |   |
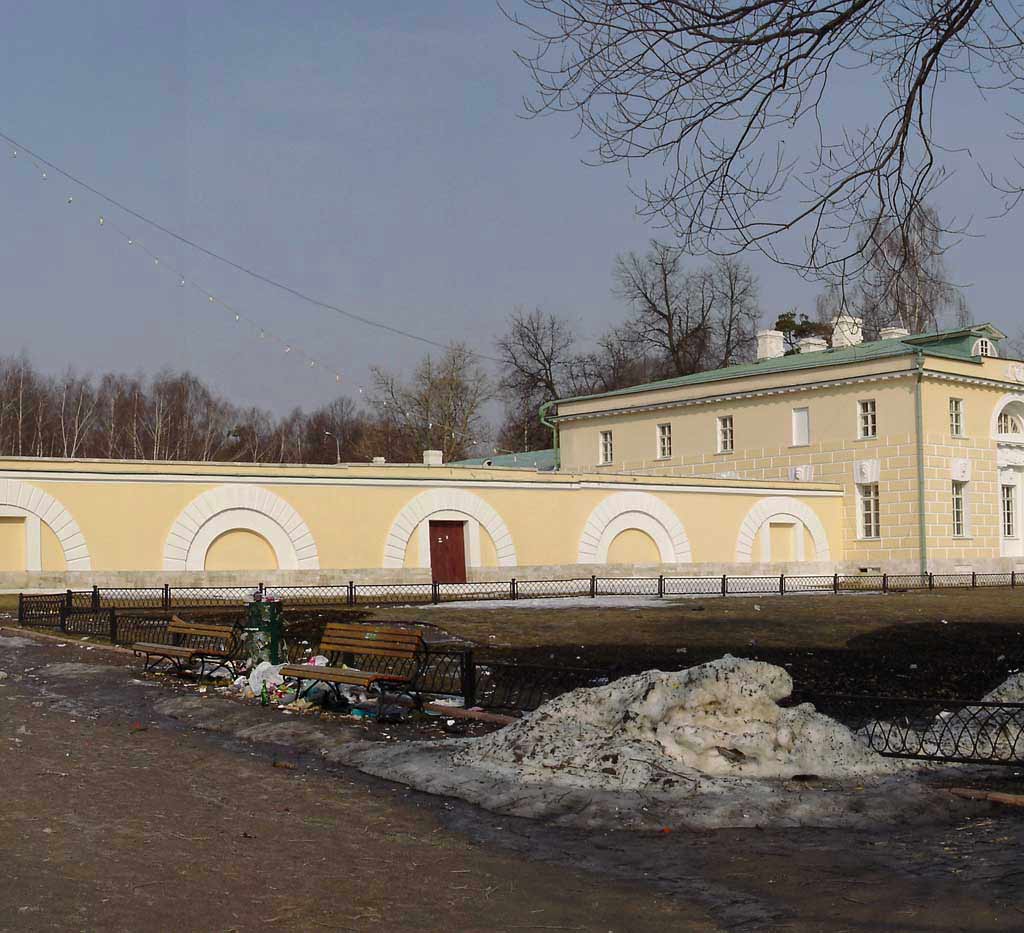
And now the result from the panorama factory
Here we can see no vertical line in the sky, but the branches are doubled, the gagrbidge is doubled, the snow heap is blurry, some fragments of the wall are missaligned. |
    
Vladislav Kravchenko
Unregistered guest
| | Posted on Thursday, May 05, 2005 - 2:56 pm: |   |
To tell the truth PixMaker did a mistake it shifted a bit the wall and the fence. I didn't see at first.
I think that I'll try to open a customer support dialog. But I have some time to prepare images. |
    
John Strait
Moderator
Username: Jstrait
Post Number: 181
Registered: 5-2001
| | Posted on Thursday, May 05, 2005 - 3:02 pm: |   |
OK, I think it would be best to communicate via the customer support system.
Our email server has a limit on the size of file attachments. If your image files are extremely large, say over 1 MB, we will have to give you instructions for transferring them via FTP. Otherwise, just attach them to your email message. |
    
Vladislav Kravchenko
Unregistered guest
| | Posted on Thursday, May 05, 2005 - 3:19 pm: |   |
Ok. I sent a request. |
    
John Strait
Moderator
Username: Jstrait
Post Number: 185
Registered: 5-2001
| | Posted on Wednesday, May 11, 2005 - 3:54 pm: |   |
I received sample images from Vladislav via support@panoramafactory.com. He also wrote to me that he does not use a tripod for his pictures.
Here is how I responded:
Because you are not using a tripod, you probably already know some of the things I will say about your panorama. Forgive me if I tell you things you already know. First I'll explain what I see in your pictures. Finally, I'll discuss some ways to correct ghosts and show you how I got a better result (I hope you will agree).
CAMERA ROTATION
CAMERA TILT
PARALLAX DIFFERENCES
CORRECTING GHOSTS WITH FINE TUNING
CORRECTING GHOSTS BY ADJUSTING THE BLENDING REGION
CAMERA ROTATION
The two photos you sent me show a very small amount of camera rotation. I am impressed by how small the rotation is--you have done a very good job with hand-holding the camera. The Panorama Factory can usually accept small rotations, so this is probably not causing the problem.
CAMERA TILT
The photos also show a small amount of tilt--the camera is tilted upward from horizontal by a small amount. We can tell that your camera is tilted upward because the doorways on the building are below the middle of the picture. When the camera is not tilted, anything that is at the height of the camera is in the middle of the picture. The Panorama Factory can sometimes have trouble with tilted pictures. I think this may be part of the difficulty.
PARALLAX DIFFERENCES
A more serious difficulty for The Panorama Factory is that the images show parallax differences. This comes from rotating the camera without a panoramic adapter. A panoramic adapter allows you to position the camera so that its "nodal point" is over the tripod's axis of rotation.
Without a panoramic adaptor, the camera's nodal point moves between one picture and the next, causing parallax differences. There are examples of parallax differences in the section Aligning the nodal point on the web page Setting up your camera.
In your photos, the parallax shift can be easily seen in the foreground branches at the top of the picture relative to the building and to the trees in the background. It is harder to see, but the snow pile is also shifted relative to the building.
As explained in Aligning the nodal point, these parallax shifts cause ghosts that can't be completely corrected.
When the ghosts are in small details like many small branches or small lines in a fence, the ghosts make the image look blurry.
CORRECTING GHOSTS WITH FINE TUNING
The Panorama Factory performs fine tuning to try to correct ghosts automatically. In fine tuning, it makes local adjustments to the image alignment to try to correct the ghosts. Unfortunately, in some cases it cannot correct the ghosting this way. The automatic fine tuning does not do a good job on your picture. I tried to manually adjust the fine tuning, but I wasn't able to get good results.
Here is a picture of my manual fine tuning:

click to see full image
Notice that there is a sharp change in the fine tuning from the snow pile to the fence and the building. This comes from a combination of parallax and camera tilt.
here is the result I got:

click to see full image
Why did I still get blurry results when the fine tuning looks correct? The answer is in the way that the fine tuning performs its adjustments. It uses a "rubber sheeting" method. This is explained in the section Why a little editing may not help on the web page A fine tuning challenge
The web page ezplains how "inappropriate tiles" can cause incorrect results. Unfortunately, the same thing happens when there is a sharp change in the fine tuning tiles of neighboring areas of the picture. In your case, the tiles on the snow pile actually affect the fine tuning of the fence. This is a problem we plan to improve in a future release.
CORRECTING GHOSTS BY ADJUSTING THE BLENDING REGION
Another way to correct ghosts is to change the width of the blending region. In other words, you make the transition between pictures in a narrow region. This is apparently the solution used by PixMaker Pro.
When you make the blending region very narrow, you eliminate most of the ghosts because they are outside the blending region. However, it increases the effect of brightness and color differences between the images. This is probably what causes the vertical line you saw in the sky with PixMaker Pro. It can also increases the effect of any alignment mismatches in the blend region. This is probably what causes the shift in the wall and the fence with PixMaker Pro.
You can manually control the width of the blending region in The Panorama Factory. You double-click the stitched thumbnail to make it the current image. And then you drag the edges of the overlap region on the stitched image. This is explained in the help section Adjusting blending region boundaries.
I tried making the blending region narrow after manually fine tuning. Here is a picture of the blending region I used:

click to see full image
And the result I got:

click to see full image
Now almost all of the image is sharp. The result looks very good to me. I do not see a line in the sky. But maybe your eyes are sharper than mine :-).
If you see the line in the sky, then the blend region is too narrow and should be made a little wider. But making it too wide will bring back the blurry regions.
Unfortunately, The Panorama Factory cannot always do a completely correct job on the ghosting and blending at the same time.
Vladislav responded to me:
Yes you are right. You found the origin of the blurry areas. Yes I can hold the camera very firm and I try not to make any tilts and other bad things. But in that way I can't eleminate the paralax because I rotate the camera together with me so there is a very huge paralax!
Your final variant looks very and very nice. I can't see any variances even I know where to look. I tried to do both of your methods (fine tuning and sizing blending areas). But I did them separately! So I couldn't achieve a good result! Thank you a lot for your explanations!
Yes, I tried your method and it helped me! Thank you a lot! Feel free to ask me for some more pictures or other help!
(Message edited by jstrait on May 11, 2005) |